How to Edit a Bulking Progress Photo
Published
Quick answer
How to edit a bulking progress photo comes down to matching your last shot's lighting, angle, and pose, then making small Chisel slider adjustments within the natural limit so the comparison stays honest.
Key takeaways
- Match lighting, angle, and pose to your last photo before editing anything.
- Keep slider moves small and consistent across the whole bulking series.
- Shoulders and Waist sliders build the V-taper; Abs and Muscle add gentle fullness.
- AI Transform adds six-pack and muscle definition, with a limited number of free uses.
- Chisel stamps an AI-altered label into each edited photo's metadata.
Here's how to edit a bulking progress photo without making it look faked: match your lighting, pose, and camera angle to last month's photo first, then make small, consistent edits with Chisel. Get the setup right and the comparison looks honest instead of inflated.
Most problems with bulking progress photo editing trace back to the photo itself, not the edit. Fix the setup first, and treat the sliders as a finishing touch, not a fix for a mismatched photo.
What makes a bulking progress photo actually comparable?
A bulking progress photo only tells you anything if it's shot the same way as the last one. Change the lighting, the distance to the camera, the angle of your shoulders, or even the outfit, and any difference you notice is the setup talking, not the photo itself. Posture matters too — a slouched shoulder in one shot and squared-up posture in the next will throw off the comparison before any slider gets touched.
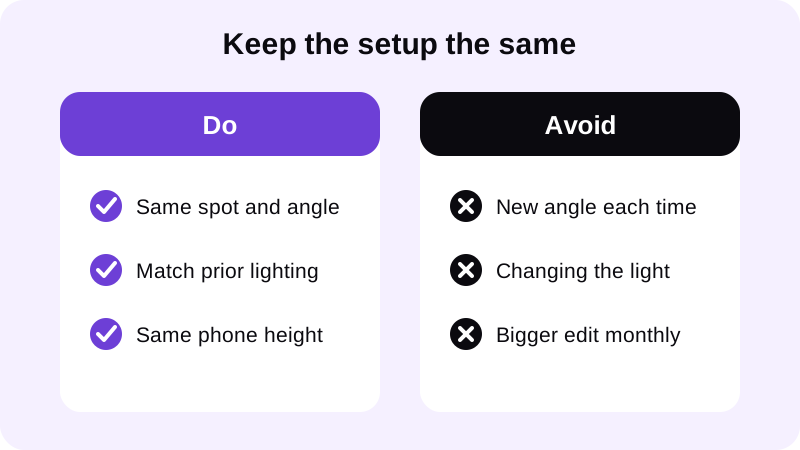
Getting consistent bulk progress photos starts with repeating the same setup, not editing harder each time. Pick one spot — same wall, same mirror, same rough time of day if you can manage it — and keep the same distance from the camera every session. Keep the phone at the same height too, and avoid switching between flash and daylight mid-series; a flash one night and window light the next will change the shadows under your arms and waist more than any slider will. Matching your lighting between shots matters more than finding one flattering angle, and a repeatable before-and-after setup is what actually makes two photos worth comparing.
How do you edit a bulking progress photo step by step?
Once the shot itself matches your last one, the editing is quick. Work through these steps in order and keep every adjustment small — the goal is a photo that still looks like you, just sharper, not a different person each month.
- Start from a photo where your torso is visible — shirtless or a fitted top both work, since Chisel's pose detection finds your torso automatically, with no manual masking.
- Match the framing, distance, and lighting to your previous progress photo before touching a single slider.
- Nudge the Shoulders slider up slightly and the Waist slider in slightly to build the V-taper, stopping well before the green natural limit.
- Add a touch of the Abs or Muscle slider for gentle fullness through the midsection, not an exaggerated shape.
- If you want more definition, apply AI Transform for six-pack and muscle detail, spending one of your limited free uses rather than using it on every photo.
- Export in HD and file the result next to your last photo, or build an animated before/after reveal if you're sharing the pair.
Which Chisel tools keep a bulking photo honest?
Chisel works as a bulking photo editor app built around a visible natural limit, marked in green on every slider, so even a fully pushed edit still looks like the same person. That matters even more across a series, where one over-edited photo stands out next to a more restrained one from the month before.
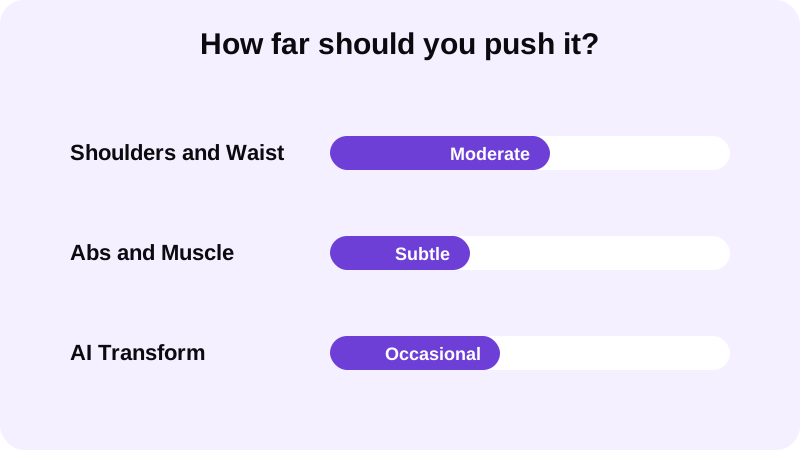
The Shoulders and Waist sliders build the V-taper: Shoulders widens the frame at shoulder height, Waist slims it in below that. The Abs and Muscle sliders both add the same gentle fullness to the middle of the torso rather than drawing in lines or shape — for actual six-pack or muscle definition, the optional AI Transform sends the photo to a third-party cloud AI provider, asks first, and includes a limited number of free uses. The Height slider stretches the whole photo vertically from the center and trims the top and bottom edges; it's a framing tool, not a way to lengthen one body part. If your background changes between locations, the background remover can cut you out as a transparent image so you can drop in the same backdrop every time, and the four one-tap Relight presets nudge brightness and contrast back toward a match instead of starting from scratch — a matched backdrop and consistent crop make the edit disappear into the photo instead of standing out. None of this touches your face — Chisel's sliders work on the body only, and the Smooth filter smooths the whole photo rather than retouching skin or features.
How do you keep a bulking photo series honest when you share it?
Every edited photo gets an AI-altered label written into its metadata, so the disclosure travels with the file even past a screenshot. That matters more for a progress series than a one-off photo, since people are comparing it directly against your earlier, unedited shots — worth keeping in mind before you post a bulking series publicly, since viewers often screenshot just one image out of the set.
If you're posting the pair, Chisel can export an animated before/after reveal built from your own two photos rather than a staged composite. One-tap presets and templates help you repeat the same edit across a whole series instead of eyeballing sliders differently every month — worth remembering alongside any other bulking physique photo tips you're following. Every editing tool is free to use. Pro removes ads and the watermark and unlocks Pro templates, and includes a 3-day free trial; a one-time Lifetime purchase is available if you'd rather skip the subscription. Chisel exports in HD, and photos larger than 2048 px on the long side are scaled down to 2048 px on import, so start from a reasonably sized photo if detail matters to you. The app needs no account and currently runs on Android, with an iPhone version coming.
Where else can you learn to edit a gym photo naturally?
FAQ
Will editing a bulking progress photo make it look obviously fake?
Not if you keep edits small and match the setup to your last photo. Chisel's sliders show a natural limit marked in green, so even a fully pushed edit still resembles the original photo rather than a different person.
Can Chisel add a six-pack to a bulking progress photo?
The Abs and Muscle sliders only add gentle fullness to the midsection, not visible ab lines. For six-pack or muscle definition, use the optional AI Transform, which sends the photo to a cloud AI provider, asks first, and includes a limited number of free uses.
Does Chisel help keep a whole bulking photo series consistent?
One-tap presets and templates let you apply the same edit settings to each new photo instead of adjusting sliders from scratch every time. Pose detection also finds your torso automatically, so the starting point is consistent across the series.
Is it obvious when a bulking progress photo has been edited?
Chisel writes an AI-altered label into the photo's metadata whenever AI Transform is used, so the disclosure stays attached to the file. It won't show as a watermark on the image itself.
What phone do I need to edit a bulking progress photo with Chisel?
Chisel is available on Android through Google Play, with an iPhone version coming. No account is required, and every editing tool, including the sliders, is free to use.