How to Take a Full Body Photo That Looks Sharp
Published · Updated
Quick answer
To take a full body photo, back up far enough to fit your whole frame with room above your head and below your feet, set the camera at chest height on a tripod or timer, and light it evenly from the front.
Key takeaways
- Stand far enough back that your whole body fits with margin at the top and bottom of the frame
- Set the camera at chest height — low angles stretch legs, high angles flatten shoulders
- Use even, front-facing light so your whole body is visible, not just your face
- Keep the background plain and clothing fitted so your silhouette actually reads
- Edit afterward with tools that show a natural limit, not ones that push past believable
How to take a full body photo comes down to three things: distance, height and a steady camera, not your pose. Back away far enough to fit your whole body in frame, hold the camera at chest height, and use a timer or tripod instead of your hand.
What's the easiest way to set up a full body photo?
Most full body photos fail before the shutter clicks, because the setup is off — too close, too low, or held in a shaky hand. Fix the setup first and the rest of the full body photo takes care of itself.
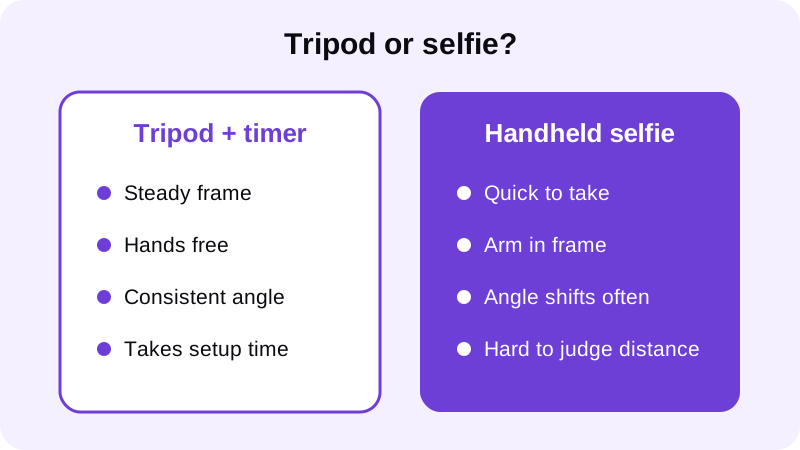
- Back up until your whole body fits in frame, with clear space above your head and below your feet.
- Set the camera at chest height on a shelf, chair or tripod rather than propping it low or high.
- Steady it with a timer or remote shutter instead of holding the phone yourself.
- Check the frame before each shot — confirm your feet and the top of your head are both fully visible.
Where should the camera sit — distance, height and angle?
These three settings do more to make a full body photo look right than anything you do with your pose. Get them wrong and no amount of posing fixes the result.
Stand far enough from the camera that your whole body fits with a clear margin above your head and below your feet — a tight crop at either end is the most common full body photo mistake. Set the camera at chest height. Shooting from a low angle stretches your legs and shrinks your shoulders; shooting from above does the opposite and flattens your frame.
Face the camera square-on or turn slightly to a three-quarter angle. A straight-on shot reads as honest and is easier to compare side by side; a slight turn can show more shoulder width. Use the back camera with a timer or tripod rather than a front-facing selfie camera, which distorts faces and bodies up close. Take a few frames at slightly different distances and angles so you have options to pick from afterward.
It's worth repeating the frame check between shots, not just at the end. Phones shift position when a timer counts down, and a slightly tilted tripod or a hand resting on a shelf can throw off the whole composition without you noticing until you review it later.
How should you light a full body photo?
Light decides whether the shape of your body is visible or lost in shadow. A full body photo needs more even coverage than a close-up portrait, because light has to reach your whole frame, not just your face.
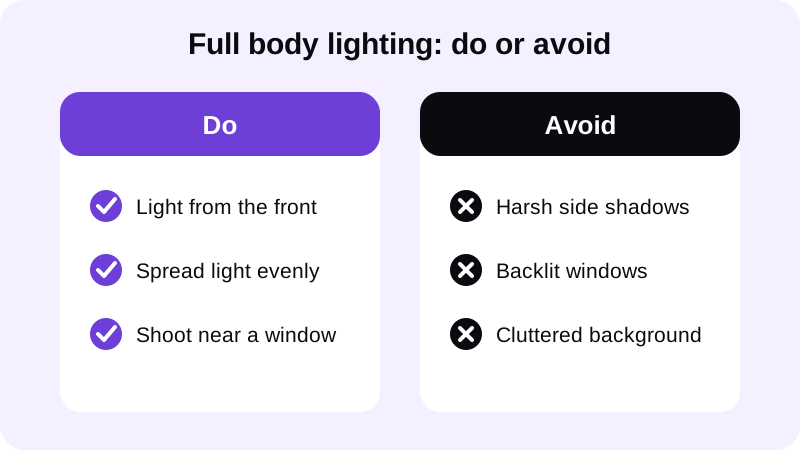
Front-facing, even light — daylight through a window or a single light source placed near the camera — shows definition clearly across your chest, arms and legs. Side lighting creates dramatic shadows on a close-up shot but tends to leave half a full body photo underlit. For a deeper breakdown of setups, see our guide on best lighting for gym progress photos.
Time of day matters more for a full body shot than people expect. Midday sun through a window tends to be harsh and directional, while an overcast afternoon or the light a couple of hours before sunset is softer and spreads more evenly across a standing subject. Indoors, a single lamp bounced off a light-colored wall or ceiling often works better than pointing it straight at yourself.
What pose and background make a full body photo look sharper?
A relaxed, upright stance with shoulders back and weight even on both feet reads far more naturally than a forced flex. For full body shots specifically, posture matters more than it does in a close crop, because the whole line of your body is visible at once — see our guide on how to fix posture in a photo for the specifics.
Keep the background simple. A plain wall, a gym mirror with minimal clutter, or an open floor all work better than a busy room, because clutter behind you competes with your body for attention. If you're shooting shirtless or in a fitted top, our guide on how to take a good shirtless photo covers angle and posing in more depth.
Clothing choice matters almost as much as pose for a full body photo. Fitted clothing or a shirtless shot both let the camera read your actual silhouette, while baggy shorts or an oversized hoodie hide the lines of your frame and make the whole shot harder to judge — and harder to edit cleanly afterward if you want to touch it up.
How do you edit a full body photo without it looking fake?
Once you have a clean, well-lit full body photo, small edits can sharpen it without changing who you are in the frame. Chisel is built specifically for this: it's an AI photo editor for men's gym and physique photos, not a general filter, and every slider shows a natural limit marked in green so the result still looks like you.
Because a full body shot shows your whole frame, proportion matters more here than in a close-up. Chisel's pose detection automatically finds your torso with no manual masking needed, which matters on a wider shot where a face-only tool would miss most of the photo. From there you can slim the waist, widen your shoulders slightly to build a V-taper, or add six-pack definition with the optional AI Transform — the sliders all stop at the same natural-limit guardrails. Our body editor for men guide walks through the full process for gym photos generally.
Every editing tool in Chisel is free to use. Chisel Pro removes ads and the watermark and unlocks Pro templates, with a short free trial, or you can buy a one-time Lifetime unlock instead of subscribing. Photos export in HD, and anything larger than 2048 pixels on the long side is scaled down when you import it. Whenever Chisel makes an AI-assisted edit, it writes an AI-altered label into the photo's metadata, so the edit stays disclosed rather than hidden. If you want to compare the original frame against the edited one, Chisel can also export an animated before/after reveal for sharing. For more on how the app handles edits and privacy, see Chisel AI: what it is and how it works.
Where else can you learn to edit a gym photo naturally?
- How to add muscle to a photo that looks real
- Body editor for men: how to edit gym photos without looking fake
FAQ
How far back should I stand for a full body photo?
Far enough that your whole body fits in frame with a visible margin above your head and below your feet. If either edge is tight to the frame, back up more or have whoever is helping move the camera further away.
What's the best camera height for a full body photo?
Chest height works best for most people. A camera placed lower stretches the legs and shrinks the shoulders, while a camera placed higher flattens the whole frame and makes the body look shorter than it is.
Should I use the front or back camera for a full body photo?
Use the back camera with a timer or tripod. The front-facing camera sits closer to your face and body, which distorts proportions, and it usually can't fit a full body shot at a normal distance anyway.
Can I edit a full body photo without it looking fake?
Yes, as long as the edit stays proportional. Chisel's sliders for abs, muscle, the shoulders and the waist each show a natural limit marked in green, so the result still looks like the same person in the photo.