How to Make Muscles Pop in a Photo
Published · Updated
Quick answer
The key to how to make muscles pop in a photo is shadow, not size: angle your light, turn your torso, and hold a brief flex before the shot. Chisel's V-taper sliders and optional AI Transform can sharpen what the light already shows, within a natural limit.
Key takeaways
- Shadow from angled light does more to show muscle than the physique itself.
- A quarter turn and a brief flex beat a flat, front-on pose.
- Chisel's V-taper sliders build shoulder width and a slimmer waist within a green limit.
- Six-pack and chest, shoulder and arm definition come only from the optional AI Transform.
- Keep edits inside the green limit and preserve skin texture to avoid a fake look.
Here's how to make muscles pop in a photo: shadow does more work than muscle does, so angled light, a slight body turn, and a flex timed right before the shutter matter most. The rest comes down to skin prep and a natural edit that sharpens what the light already suggests.
What actually makes muscle pop in a photo?
Muscle definition in a photo is mostly an illusion of light and shadow. A lean, well-defined physique can still look flat under flat lighting, while a slightly softer build can look sharper under the right conditions, because the camera reads contrast between light and dark areas, not muscle itself. Good muscle definition lighting comes down to shadow placement, not brightness, and that holds true before any editing happens.
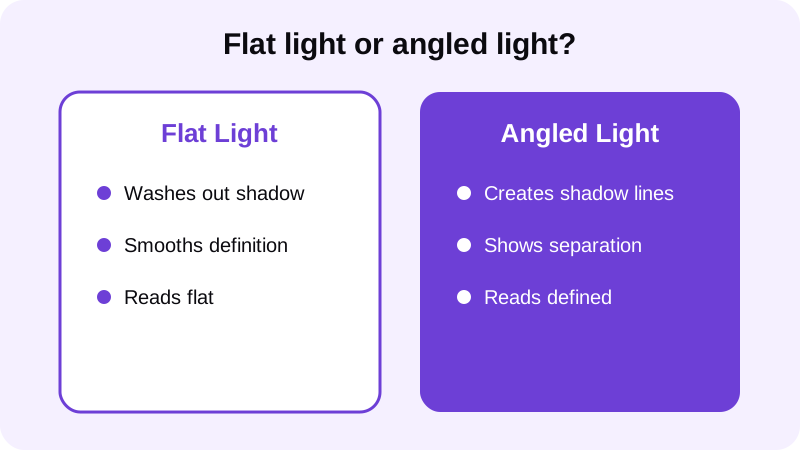
A camera doesn't measure muscle size — it only records brightness across the frame. Two photos of the same arm, lit from different angles, can show completely different levels of definition even though nothing about the arm changed between shots. That shadow is the real source of muscle definition in a photo, and every tip below is built around creating more of it.
That's why the same person can look different in two photos taken minutes apart. Light direction, pose, and a little skin prep change the result more than the physique in front of the camera does. For a deeper look at setting up that light source, see our guide on best lighting for gym progress photos.
How do you pose and light a photo so muscle definition shows?
Once you understand that shadow sells definition, the setup becomes straightforward: move your light to the side of your body, and build a pose with some natural turn in it instead of a flat, square-on stance.
- Move your main light source — a window, a lamp, or an angled gym light — to the side of your body instead of straight on.
- Turn your torso slightly away from the camera; a quarter turn shows more shape than a flat, front-on stance.
- Relax between shots, then flex for a second or two right before the photo, so the muscle reads as engaged rather than strained.
- Lower the camera slightly below chest height and shoot a touch upward for a subtle sense of size.
- Check your skin under the light — a light sheen reflects highlights that sharpen the lines between muscle groups, while dry or oily skin reads flat.
Flex timing matters more than flex intensity. A second of held tension right before the shutter reads as natural; holding it through an entire set of photos usually looks strained by the last few frames.
Posture does a lot of the work too. Rounded shoulders and a forward head hide the chest and shoulder lines that make muscle pop. If your stance tends to collapse in photos, our guide on how to fix posture in a photo covers simple adjustments that open up the torso. A plain, uncluttered background also helps, since clutter behind you pulls the eye away from the shadow lines on your torso rather than toward them.
How do you use editing to make muscle pop without looking fake?
Lighting and pose get you most of the way there, but a photo taken under awkward gym lighting doesn't always cooperate. A natural muscle photo edit helps at that point — not by adding muscle that isn't there, but by shaping the torso and sharpening what the light already hints at.
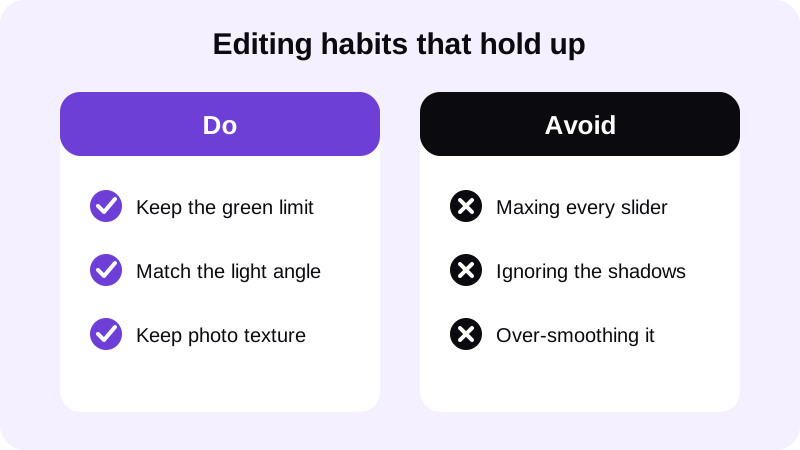
In Chisel, the V-taper sliders — Shoulders and Waist — do the work: Shoulders widens the body at shoulder height and Waist slims it at the waist, each stopping at a natural limit marked in green so the result still looks like your actual frame. Chisel's pose detection finds your torso automatically in a shirtless photo or a fitted top, with no manual masking needed. A slimmer waist also makes shoulder definition read more clearly in a photo, since the contrast between a narrower waist and a broader upper body is part of what sells a V-taper in the first place.
The Abs and Muscle sliders don't draw ab lines or add muscle definition — both apply the same gentle fullness to the middle of the torso. Visible six-pack lines, and chest, shoulder and arm definition, come only from the optional AI Transform, which asks first and sends that one photo to a third-party cloud AI provider, with a limited number of free uses. See how to add muscle to a photo that looks real for the full process.
Chisel doesn't touch the face — no jawline, eye, teeth or beard edits — so a sharper jaw or cleaner beard line still comes down to posing, angle, light and grooming rather than any tool. If you want the texture of the whole photo evened out, the Smooth filter does that across the frame; it isn't a face or skin retouch. Every editing tool in the app is free to use, Pro removes ads and the watermark and unlocks Pro templates and includes a 3-day free trial, and photos export in HD. For more on how the app is built, see Chisel AI: what it is and how it works.
Either way you edit, Chisel writes an AI-altered label into the photo's metadata, so the edit is disclosed rather than hidden.
What mistakes make muscle look flat in a photo?
A handful of habits quietly cancel out everything above. Watch for these before you blame the lighting or the photo itself.
- Standing dead square to the camera. A flat, front-on pose compresses the body and hides the side shadows that create shape.
- Overexposing the shot. Bright, blown-out highlights erase the shadow detail that gives muscle its edges.
- Flexing too early or too long. Holding a flex through a full set of photos usually looks tense by the last few frames.
- Pushing every slider to its edge. A V-taper built past the green limit stops matching the rest of the photo and starts looking inflated.
- Smoothing the whole photo too aggressively. The Smooth filter is meant for even skin tone across the frame, not for erasing every shadow that defines the torso.
Where else can you learn to edit a gym photo naturally?
- How to add a six-pack to a photo (without looking fake)
- How to widen shoulders in a photo (naturally)
FAQ
Does flexing longer make muscle look more defined in a photo?
No. Flexing for a second or two right before the shutter looks natural, but holding a flex through an entire set usually tightens the face and neck and looks strained by the last few frames. Relax between shots and flex only right before each photo is taken.
Can editing add six-pack or chest definition to a photo?
Chisel's Abs and Muscle sliders only add a gentle fullness to the middle of the torso — they don't draw ab lines or muscle definition on their own. Six-pack and chest, shoulder and arm definition come from the optional AI Transform, which asks first and uses a cloud AI provider.
What's the best camera angle to make muscle pop?
A slight downward angle with the torso turned a quarter away from the camera usually works better than a flat, front-on shot. It creates natural shadow lines along the muscle groups instead of compressing the body into one flat plane.
Does lighting matter more than the physique itself?
Largely, yes. The camera reads contrast between light and shadow, not muscle directly, so angled light can make a softer build look more defined than the same person photographed under flat, head-on light.
Will editing tools for muscle definition look fake?
Not if used in moderation. Chisel's sliders stop at a green natural limit, and the optional AI Transform aims to keep your face, pose and background unchanged. Staying inside that limit, keeping skin texture, and matching the original lighting are what keep an edit believable.